Your phone is full of revealing personal data like your search history, location data, and emails and texts with friends and family. This can make it low-hanging fruit for busybodies to target, whether it’s corporations that want to monetize you, nosy loved ones, or strangers with bad intentions.
It can be hard to even find out which apps are collecting what information about you much less stop or limit them. Here are nine simple tweaks you can make in the latest versions of iOS to keep your private life as private as possible. Some of these might make your day-to-day life a little less convenient, but we’ll discuss exactly what trade-offs each comes with so you can choose for yourself which ones are worth it to you.
Control app behavior tracking
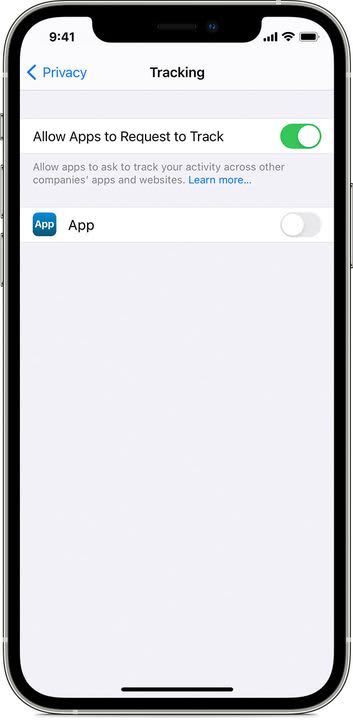
Apps are constantly asking you for permission to access your contacts, calendar, camera, microphone, and other sensors and services so they can track your behavior. If you’d prefer not to be spied on, you can nip these requests in the bud by going to Settings > Privacy > Tracking and disabling the Allow Apps to Request to Track option at the top.
If you’d prefer to only limit some apps and let others track your behavior, leave the Allow Apps to Request to Track option green. You can scroll down the list of apps below it and turn off permissions selectively.
Track your apps with App Privacy Report
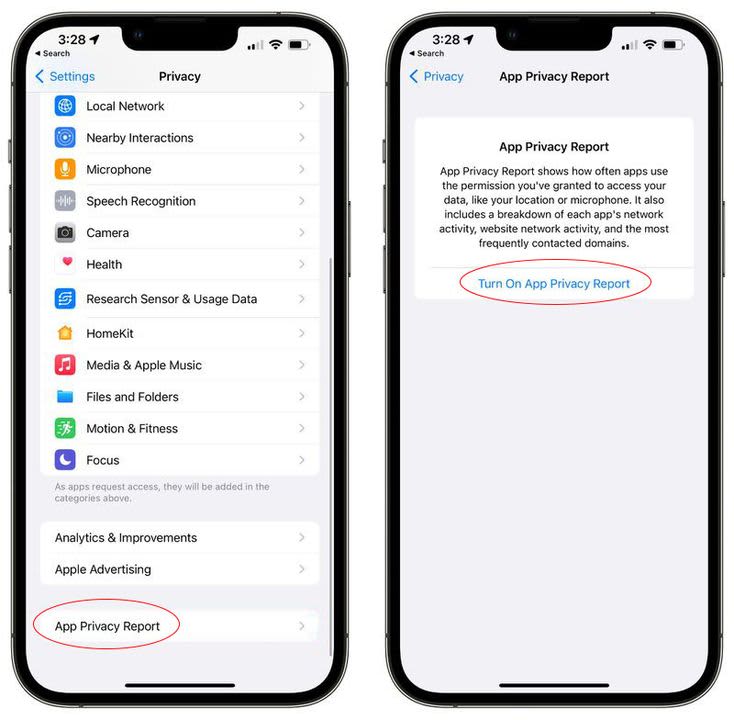
If you’d like to learn more about how your apps are tracking you, turn on Apple’s App Privacy Report. Once activated, it begins to gather information about how often the apps on your phone are accessing private data, like your contacts, notes, and messages, and sensor data, like your location, microphone, and camera.
Visit Settings > Privacy, and tap the button labeled App Privacy Report at the bottom of the menu. Next, tap Turn On App Privacy Report to start tracking your apps.
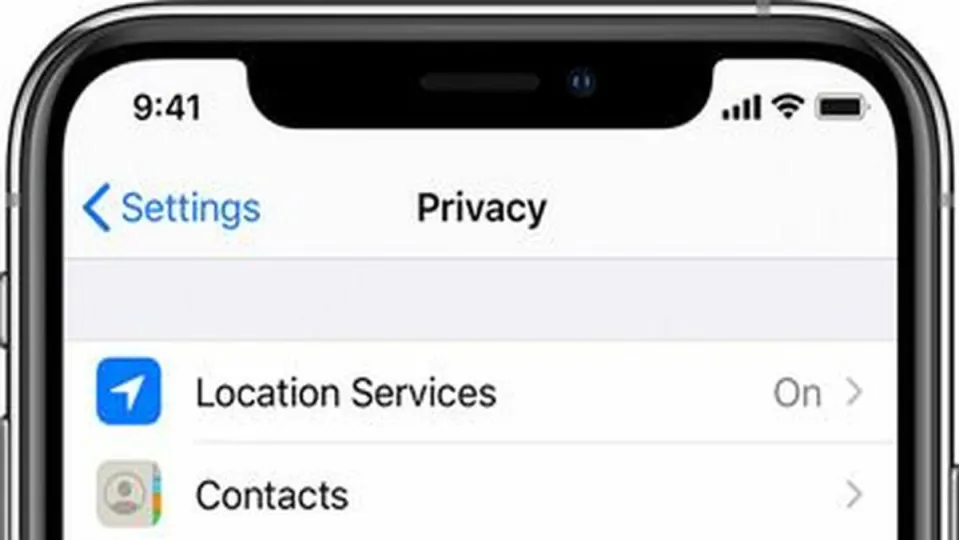
Control access to your Location Services
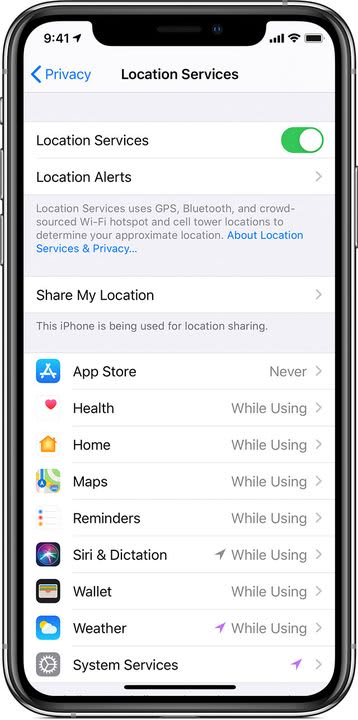
One of the most egregious app overreaches is unnecessarily spying on your location. Go to Settings > Privacy > Location Services, and scroll down to see which apps have access. You’ll notice the options are Always, Never, and While Using.
The apps that display a solid purple arrow are tracking your location right now. The ones with a gray arrow have tracked you sometime in the last day. The ones with a hollow purple arrow are using geo-fencing to provide you region-related services and notifications.
You can select While Using for the apps you’d like to let keep their GPS functionality or Never for apps that don’t need to know where you are. Very few apps will need the omnipresent, battery-draining Always option.
Control system services that track your location
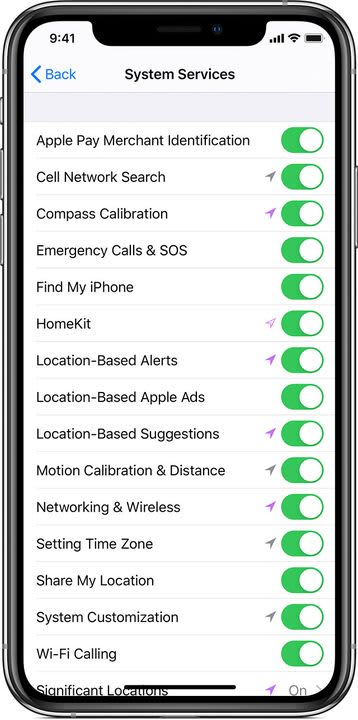
Stay in the Location Services window, and scroll down to the bottom. Tap on System Services. Here you can see all the system processes that have access to your location data by default.
You can turn off location tracking for any service you decide doesn’t need to know where you are. Tap its green toggle switch on the right to turn it gray. We recommend leaving location on for only the most essential services like Emergency Calls & SOS, Find My iPhone, and Networking & Wireless.
Clear your significant locations
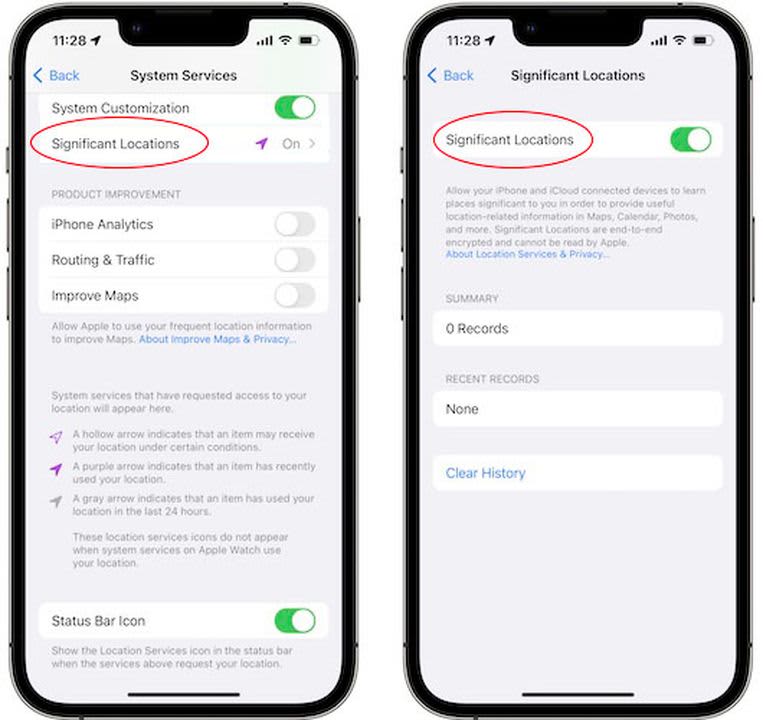
Apple’s Maps app tracks the places you visit often, adding them to its list of your Significant Locations. This allows Maps to personalize some route information, but it can also provide details about your routine to bad actors.
If you want to disable the feature, go to your Settings > Privacy > Location Services > System Services menu and scroll to the bottom to find the Significant Locations menu. Tap the green switch to turn it off. You can also erase your frequent location history by tapping the Clear History option at the bottom of the menu.
Keep your mail activity private
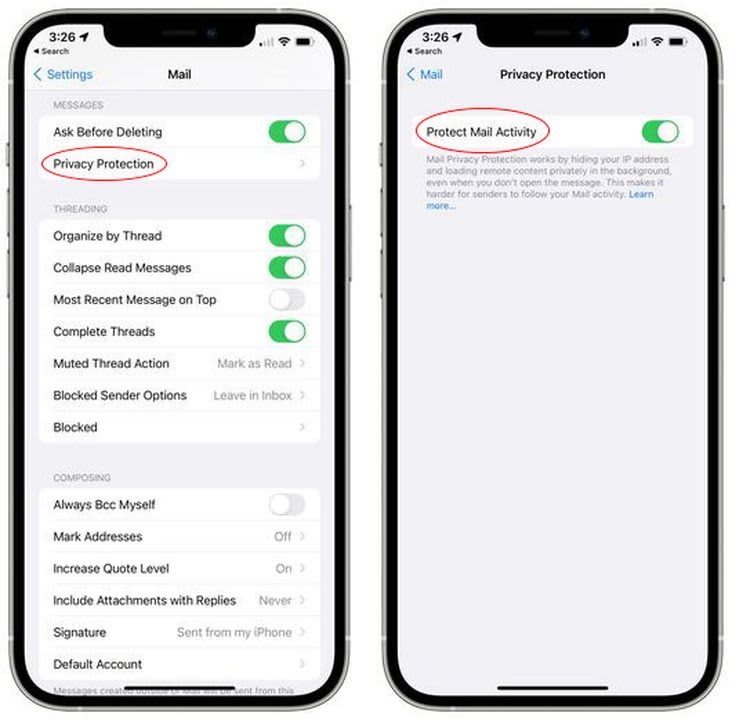
Some marketers have started adding tracking technology to their emails that runs in the background to check if you’ve viewed the email and from what IP address. You can block these trackers by going to Settings > Mail > Privacy Protection and toggling the green switch to gray by the option labeled Protect Mail Activity.
Senders will no longer be able to tell if you’ve opened their email, and your IP address will remain anonymous so marketers can’t use it to track your online activity. They will still see if you click a link in their email, though.
Hide your real email address

iCloud+ subscribers now have a Hide My Email option. This allows you to generate unique email addresses that forward to your actual email address so you can keep your real email private.
When Safari or Mail asks you for your email address, tap the empty email field, and hit Hide My Email in the popup menu. You can create as many random simulated email accounts as you need. Manage or delete them from your Settings menu by tapping your name then iCloud > Hide My Email.
Prevent websites from tracking you
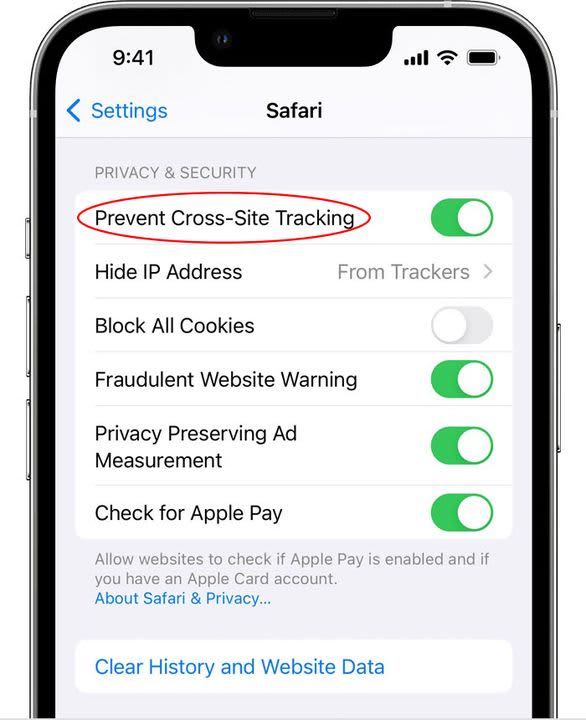
Keep nosy websites from following you as you browse the internet in Safari by visiting Settings > Safari. Scroll down until you see the section labeled Privacy & Security, and disable the green toggle switch next to the Prevent Cross-Site Tracking option.
Make your IP address invisible
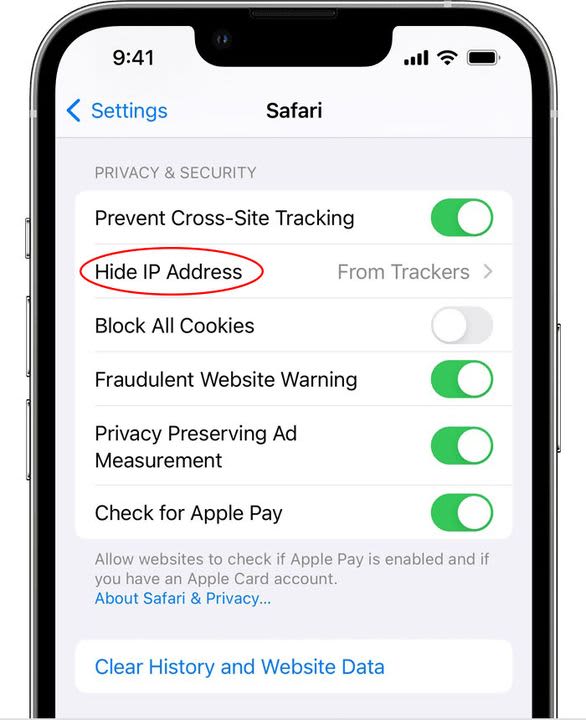
You can go a step further to shut out snooping websites in Safari by making your IP address invisible to web trackers. Without your IP address, trackers will have no way to uniquely identify you online.
Right below the Prevent Cross-Site Tracking button we showed you above, you’ll see the option to Hide IP Address. Toggle the green switch to gray to turn it off.
Cut down on data harvesting with these privacy tips
It’s impossible to completely stop the data-driven marketing machine, but you can severely limit it with the above ideas. Some of these settings have a way of turning back on after iOS updates, so be sure to check on them every so often.
If you’d like to keep your iPhone even more private and secure, explore some of the essential security and privacy apps for iPhone.

